.jpg)

YouTube Companion Video: https://youtu.be/yoAZLeF1h10
Costume College, hosted by the Costumer's Guild West, has extraordinary classes, amazing tours, and fabulous social events. The Sunday Fantasy Tea has always been my absolute favorite of the entire weekend. The Fantasy Tea theme for 2024 was Vintage Tropical Tea Party.

Amy, my roommate for Costume College 2024, sent me a perfect fabric to create something to wear for the Sunday Fantasy Tea and I love it!

My pattern search led me to Simplicity S9290 which was also originally offered as Butterick B6354 and designed by patterns by Gertie.


Described as a "Gertie Retro 1940's Hawaiian Tiki Playset Sewing Pattern. Self-lined bolero. Close-fitting, lined, boned bustier has front band and detachable (button) halter strap. Fitted, wrap skirt has pleated right-front, and tie ends. Purchased bias tape to finish waist. Shorts have waistband. A collection of four tiki-inspired resort separates that can be worn layered or on their own."

The fabric gift from Amy will be perfect for the bolero and skirt and I have a nice black linen remnant in my stash which will be cool and comfortable for the bustier and shorts.

The Turban
While pattern surfing on Etsy I discovered Depew Patterns Turban #1014 which looked so fun. I thought this piece would pack and travel well and be a great addition for those days when my hair needed to hide under something with a retro vibe.

The turban can be made with or without the back inset and for maximum hair hiding, I choose to add the back inset.

The pattern is 3 pieces: Turban K, Turban Trimming M, and Turban Inset L.

Using a black cotton fabric, all pieces are cut on the bias and marked.


The ends of the Turban Part K are joined and a narrow hem sewn on one edge as marked.


Gathering stitches are sewn through the seam joining the ends and 1/4" on either side.

The same gathering stitches are sewn on the center front as marked.

The gathering threads are pulled up to a 2" width and the threads knotted to secure.


This is repeated for the center front gathering threads.

The long edges of the Turban Inset L are finished with a narrow hem.

Seven rows of gathering stitches are sewn as marked on each short end of the Inset.

The gathering threads are pulled to a 2" width and knotted.

The inset is positioned to the completed Turban K where marked, sewn in place, and the unfinished edge of the Turban K can now be finished with a narrow hem. The bias cut fabric and gathering allows the finished turban and inset to fit the head closely and can be worn with the bands wide or narrow.


The Turban Trimming included with the pattern is a quick and easy embellishment. The ends of the strip are joined and the long edges finished with a narrow hem.
.jpg)
The piece is folded and gathered through the center.

The gathers are pulled as tightly as possible and knotted to secure.


I've attached the trimming to the turban so that it is easily removed and replaced with any other colored trimming or even a colorful ribbon flower.


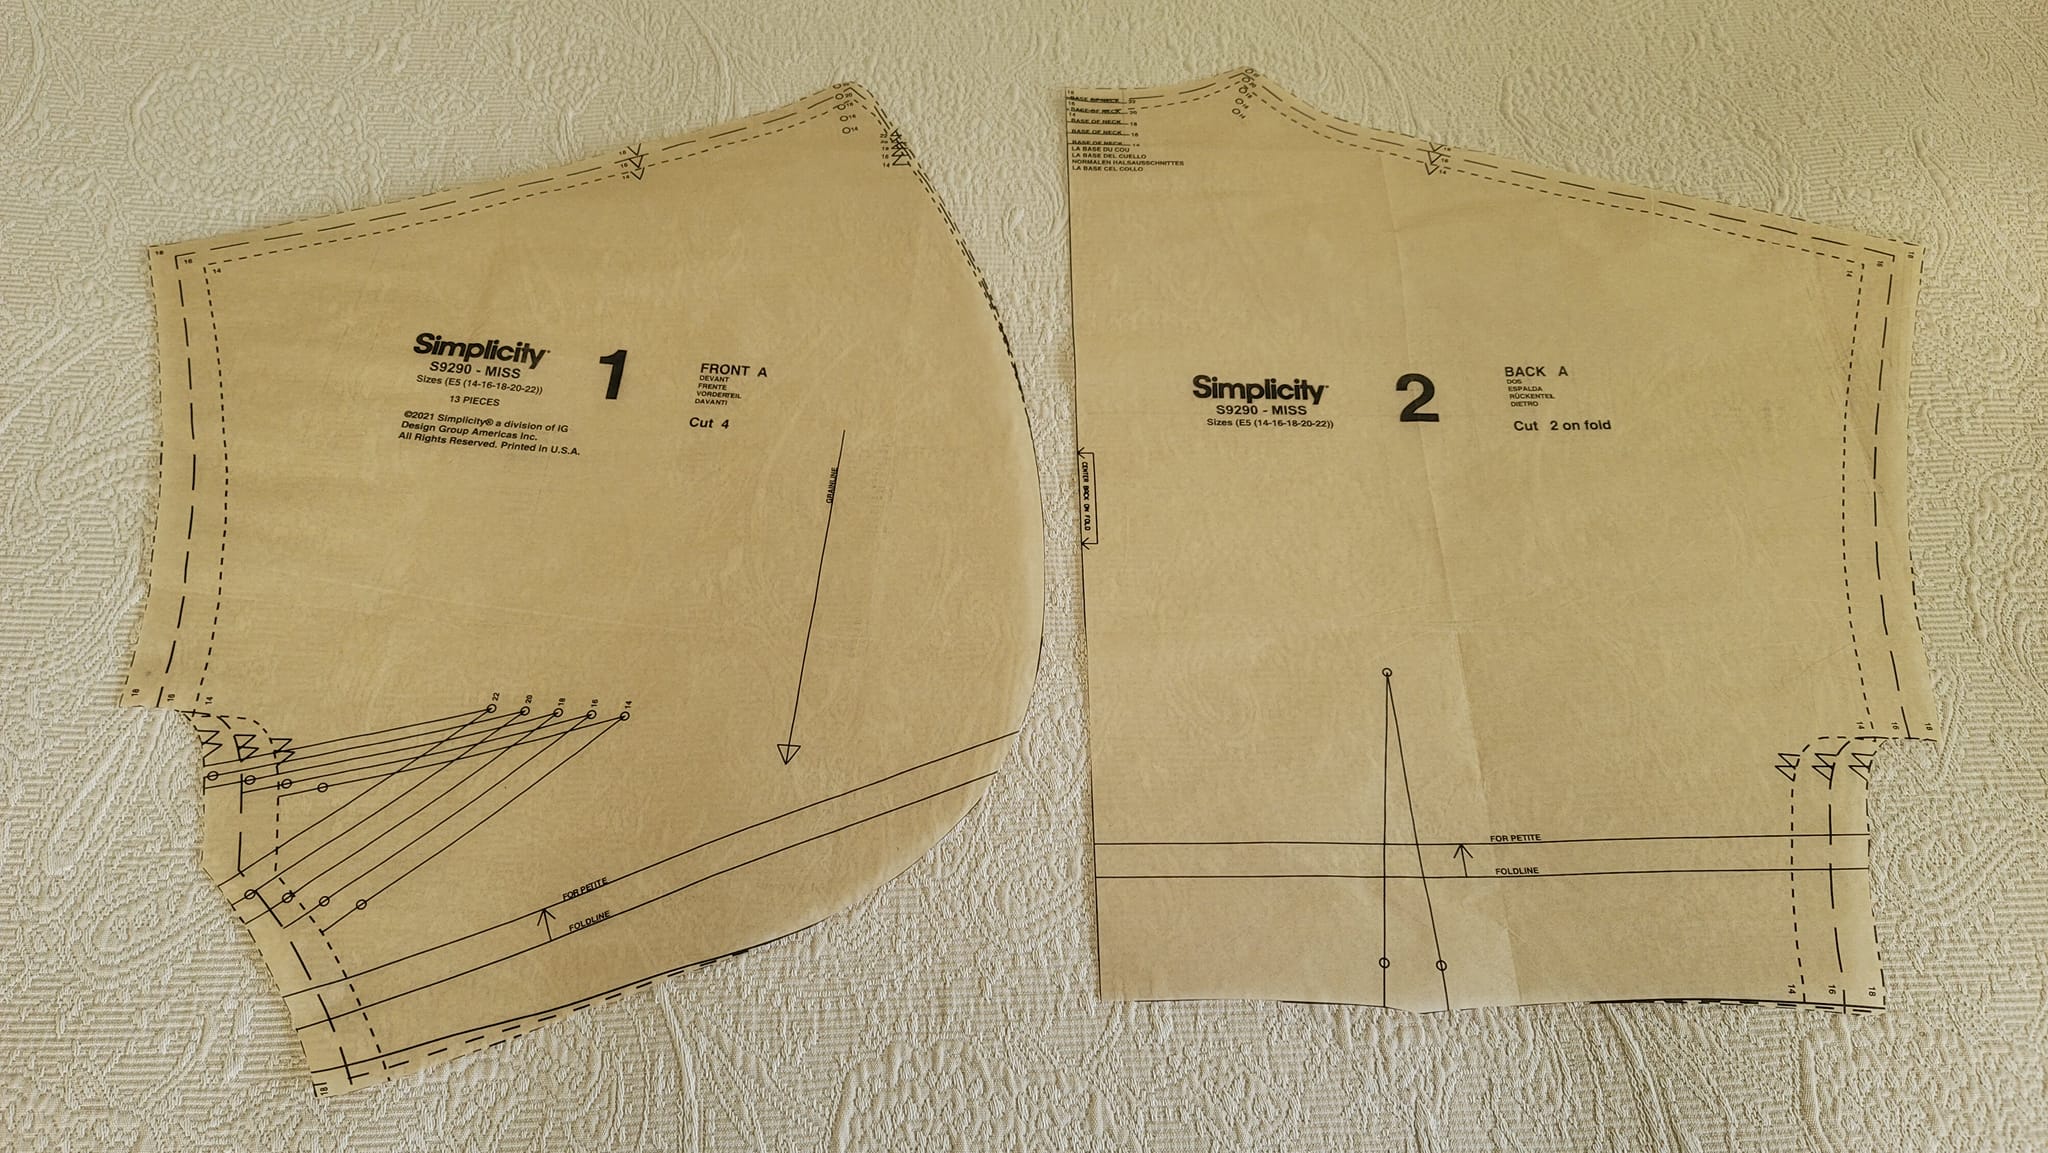
The Bolero
The pattern is marked as easy-to-sew but I still take time to read the instructions, study the illustrations, and write myself a step-by-step which will allow me to cross off steps to mark my progress and give me a feeling of accomplishment.

The bolero is self-lined and I cut 4 of the Front 1, and 2 on the fold of Back 2.

A red heat-erasable pen is used to mark the Front darts.

The darts are sewn into the Fronts and pressed down.


The darts are marked and sewn into the Backs and pressed toward the center.


The back neck edge is staystitched.

The fronts are stitched to the back at shoulders and overarm, and sides and underarm.

The seam allowance is turned in on the sleeve edges and pressed. I've also pinned mine as I've used only light heat on this fabric.

The bolero lining is sewn the same way as the bolero exterior.

The work-in-progress tells me I'm going to love this combination of playset and turban.

The lining is pinned to the bolero right sides together.

The front opening, neck, and lower back edges are stitched together leaving an opening at the center lower back edge.

The bolero is turned right sides out through the opening in the lower edge.


The lining and bolero sleeve edges are aligned and slipstitched closed. The opening left at the back lower edge is also slipstitched closed.


A final pressing and the bolero is finished!


The Sarong or Skirt
The pattern calls this a sarong but is made of separate fabric pieces rather than a single fabric piece although it does wrap and tie to close.

There are four pattern pieces and they are cut from the floral fabric. #7 Right Front cut 1,


#8 Left Front cut 1,


#9 Back cut 1 on the fold, and #10 Tie End cut 4.


Marks are made following the pattern for pleating in the Right Front. The pleats are made and basted as marked.


A dart is sewn in the Left Front and pressed toward the center.

Darts are sewn in the Back and pressed toward the center.

The Right Front and Left Front are sewn to the Back and seam allowances pinked.


The Tie Ends are sewn and prepared for attaching to the sarong. Each is finished a bit differently at the open end for placement on the sarong.


The Tie End prepared for the back of the sarong is pinned to the upper left side of the Back where marked and basted in place.

To funish the waistline bias tape is placed at the upper edge with the crease along the seamline and the front opening end turned under. The bias tape is stitched in place and the excess fabric trimmed away.


The bias tape is then turned to the inside and machine stitched at the lower edge of the tape.

The Tie End prepared for the Right Front is pinned to the corner at the pleating as marked and stitched leaving the folded edge of the Tie End free.

The Tie End is turned to the inside to cover the stitching just made and pinned to the sarong at the back and stitched close to the pressed edge.


A snap is sewn where the left front and right front sections will overlap when the sarong is worn.

The sarong is finished! To wear, wrap the sarong around your back, bring the left side close to your front and then bring the right side close to your front and snap. Then bring the tie ends together and tie. The snap and tie combination makes for a very secure overlap.


The bolero and sarong are such an easy way to change any shorts, top, or swimsuit into an entirely different ensemble.


The Shorts
The shorts are made from just 3 pattern pieces: #11 Front, #12 Back, and #13 Waistband.

A black linen is used for the shorts. Two pieces are cut for the Front, two for the Back, and one for the waistband.

Darts are marked and sewn into the Fronts, Backs, and all pressed toward the center.


The Fronts and Backs are stitched together at the inner leg.

A zipper is sewn to the left and right Backs.


The remainder of the crotch is then sewn.


The back is sewn to the front at the sides.

The next step in the instructions is to easestitch the upper edge. The pattern Glossary defines this as "Stitch along seamline, using long machine stitches. Pull thread ends when adjusting to fit."

The waistband may be reinforced with interfacing, if desired. The seam allowance is turned in on one edge of the waistband, pressed, and trimmed.

The waistband is pinned to the upper edge of the shorts matching markings, adjusting fit with the easestitch threads, and sewn.

The waistband is folded right sides together and the ends sewn, trimmed, and turned.


The pressed edge of the waistband is handstitched to the inside of the shorts just covering the stitchline.

A tailor hook and bar are attached.

Although the instructions called for a narrow hem, I finished my hem with bias tape to add a bit to the shorts length.

The finished shorts! Which sit a bit wonky on Vickie, the dressform, as she has a pole in her middle.


These shorts are cute and are.....well.......short!

The Bustier (boo stee ay)
While the pattern is listed as Easy-to-Sew, the bustier has few pieces but a lot of details which take some time and attention. They are very well described and illustrated.


There are 4 pattern pieces for the bustier: #3 Front, #4 Front Band, #5 Back, and #6 Strap.

The outer linen fabric is cut with 2 pieces each of the Front, Front Band, and Back. One piece is cut for the Strap.

A black cotton is cut for the lining with 2 pieces each of the Front and Back.

I carefully transfer the pattern markings for the darts and boning. Which was a mistake! The boning is sewn to the lining! Now you won't have to make that same mistake I did.

The darts are sewn in the Fronts.


The Fronts are sewn together at the center front.

A Pellon iron-on woven cotton interfacing is cut and fused to the wrong side of each Front Band.


Pattern markings are transferred to the Front Bands.

The Front Bands are sewn together at the center front and the seam allowance trimmed.

The Front Band is turned right side out and folded along the roll line, pressed, and pinned to hold.

The Front Band is pinned to the Front matching markings and stretching the Front Band as necessary to fit.

And sewn.

The Front Band is such a perfect 1940s design detail.

With the Front complete it's time to sew the Back. Darts are sewn in both Backs and the different seam allowances in the center back are turned in and pressed.

The back of the bustier will close with a separating zipper and I found one made just for this project.


The zipper is sewn in the right center back edge, then sewn in the left center back edge creating an overlap. The pattern instructions and illustrations provide really good detail.


The Backs are now sewn to the Front at the sides.


The lining is sewn in the same manner but without the Front Band.

And this is where I realized that the boning is to be sewn to the interior of the lining. So I take care to transfer all pattern markings (again) working around the darts and curves.


I'm using a Featherlite boning already in its own casing.

The 10 lengths of boning and casing are cut as marked, the boning removed and trimmed as directed and the ends rounded. The casing is pinned and sewn to the wrong side of the lining as marked. Then the boning is reinserted in the sewn channels and the channels basted closed on both ends.


The lining is pinned to the bustier right sides together and the upper and lower edges stitched and trimmed.

The sewn bustier is turned right sides out and pressed.

The lining center back edges are slipstitched to the zipper tape.


The Strap is folded and sewn right sides together leaving an opening. The seam allowance and corners and trimmed. The Strap is turned right side out through the opening and the opening slipstitched closed. The positions of the strap buttonholes and buttons are marked for fit and the buttonholes and buttons sewn.


A finished bustier!


And the last item is crossed off the list!

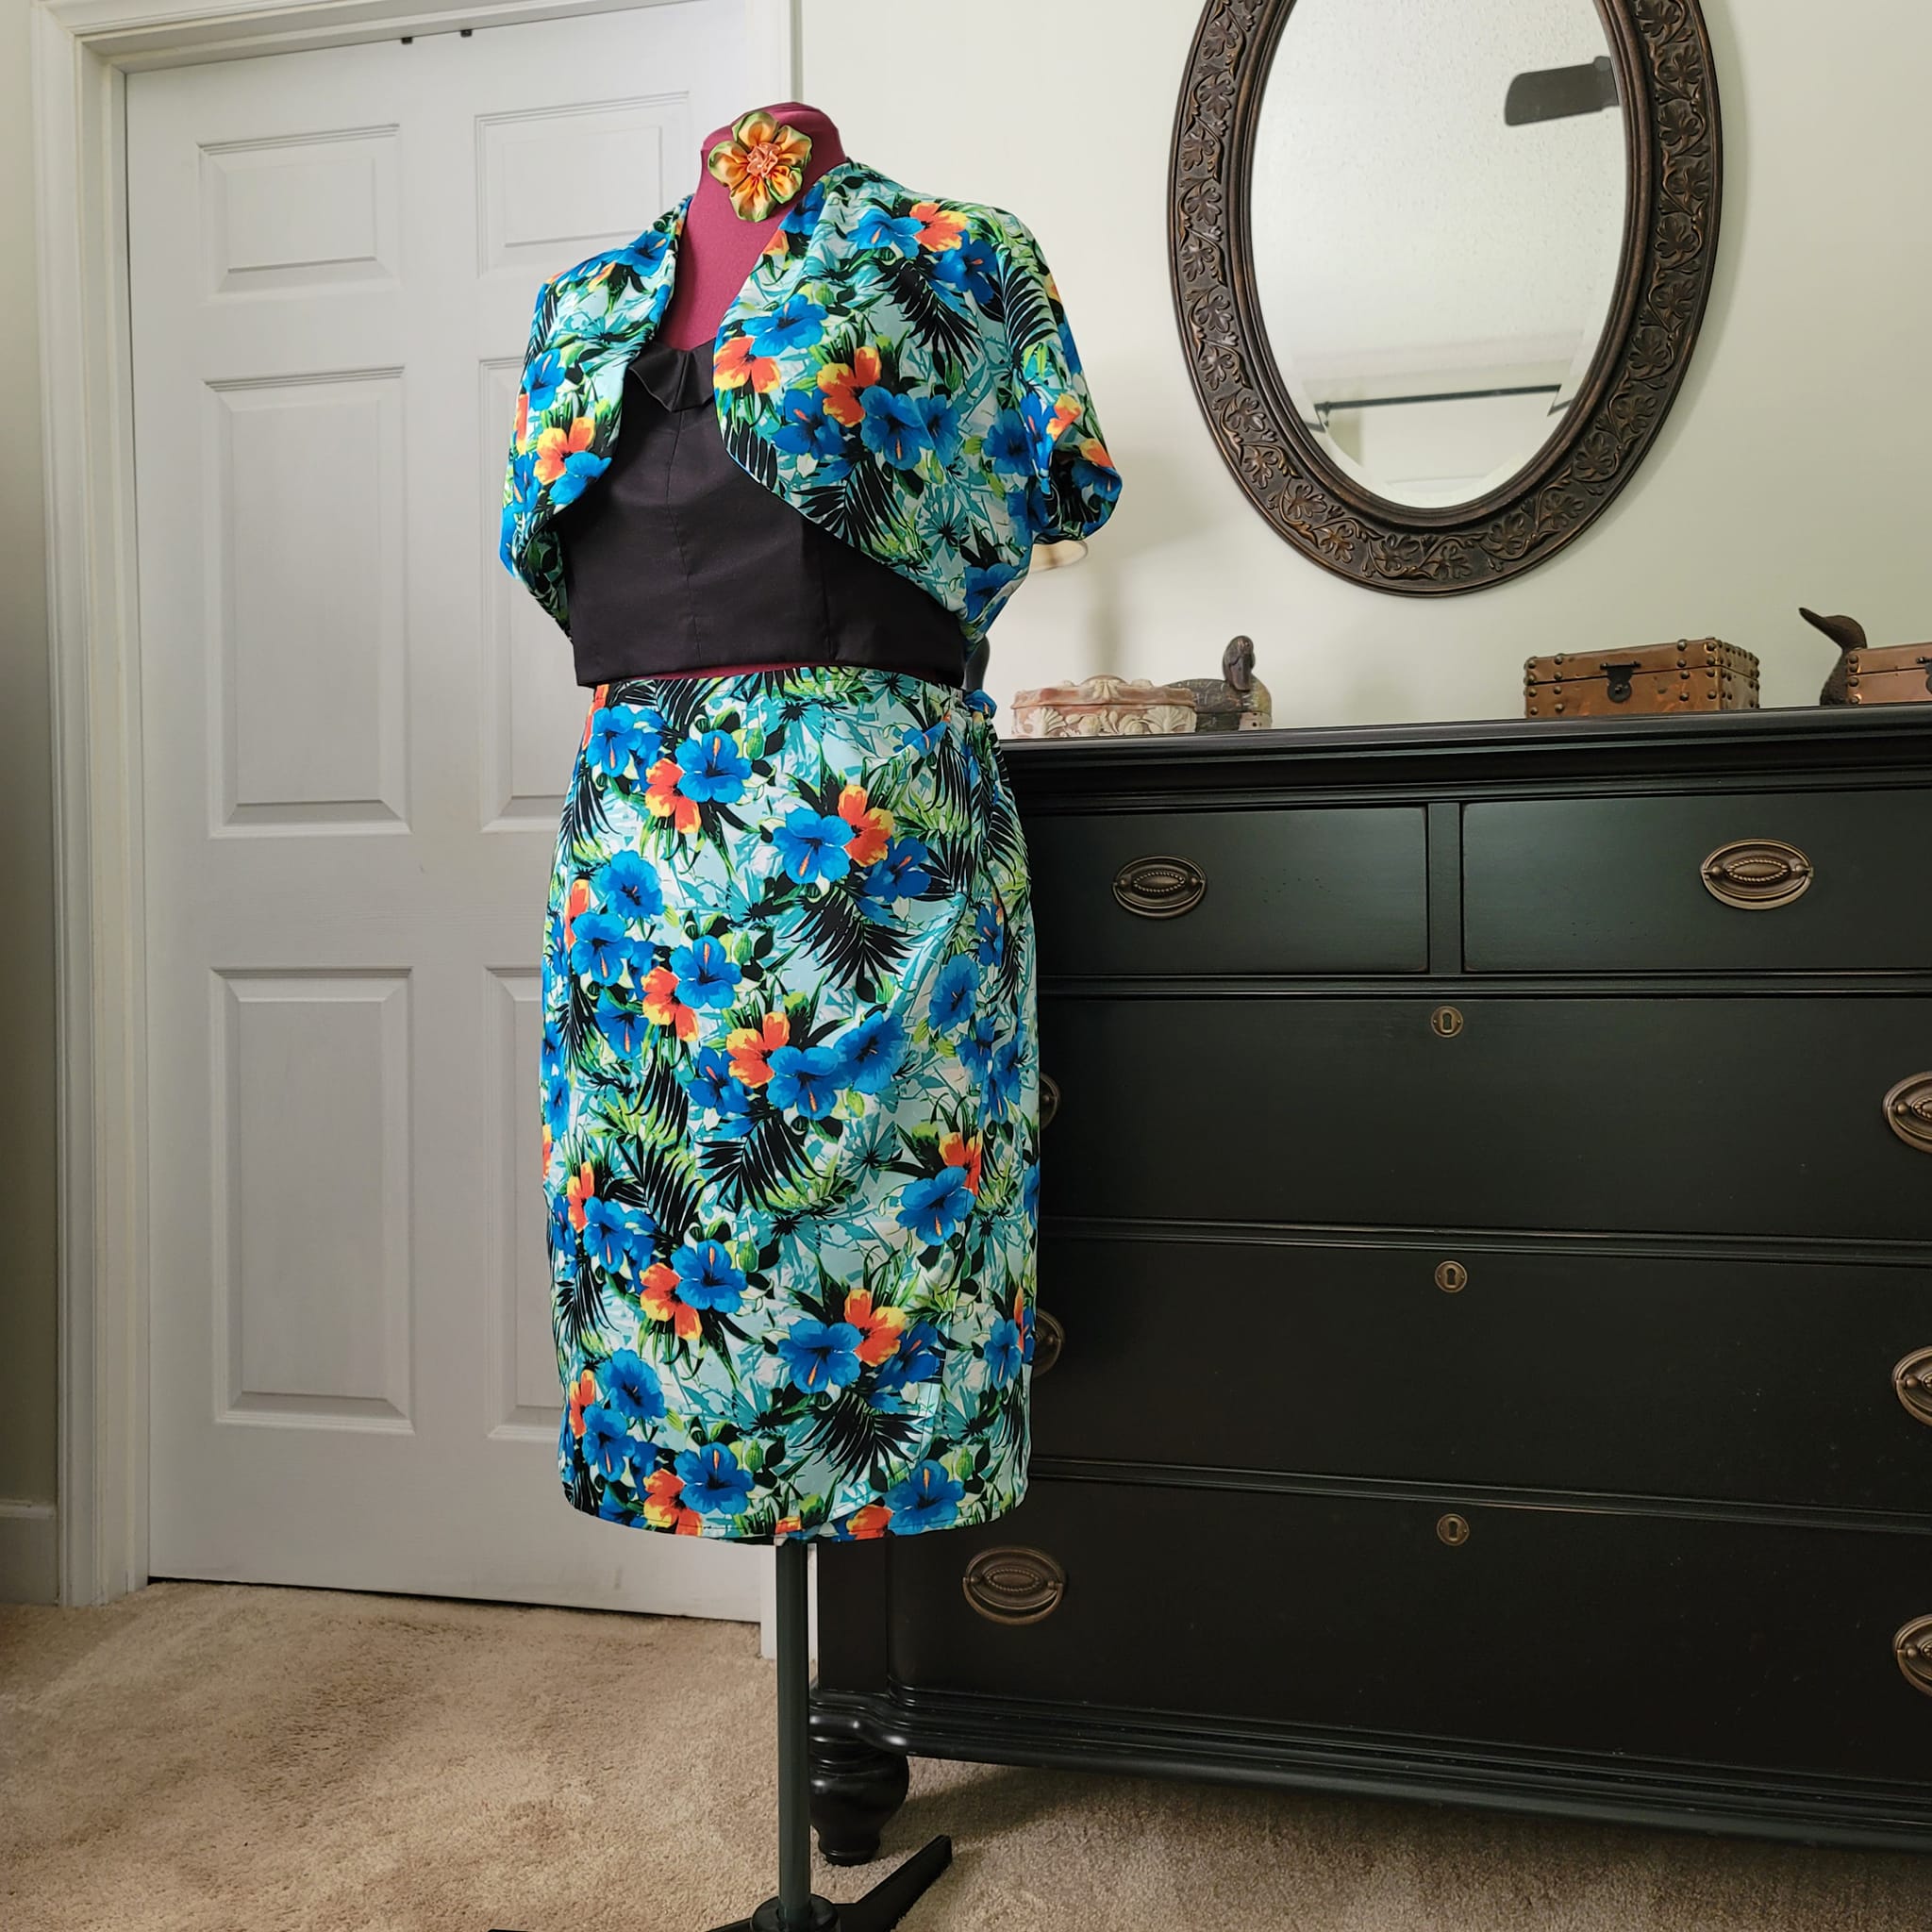
The Finished Playset
A nice collection of pieces to be worn as separates, all together, or with other separates.


And the Costume College Sunday Fantasy Tea? Yes, I went and as always, it was incredible!


I had been sharing my progress on social media and Val, the 2024 Costume College Dean, asked if I would share my 1940s Playset and Turban in the Fantasy Tea Fashion Show. I agreed and wore the four-piece set with the turban and removed the bolero and sarong to show the shorts and bustier. A brave move for this introvert and received in all good fun by the other attendees. It was also fun to wear the pineapple necklace and earrings that were part of my Ribbon Flowers and Embellishments class presented the previous day.
2ndEdit.png)


In this photo on the right is Amy, my Costume College roommate and the friend who so generously gave me the fabric used for my bolero and sarong. We are with two other Fantasy Tea attendees. We had to have this photo taken as we are all wearing costumes created with Gertie Patterns! An amazing end to a fabulous event!

Amy with her friend and you can watch them sing on the YouTube Companion Video for this post. Harry Belafonte's Jump in the Line, also on YouTube.


Hugs,
Jeanette


